
Cart is empty
Patio Chair Makeover
Category: Blogs
Author Name: Morgan Battisti
Posted: 07-08-2014 02:39 PM
Views: 25766
Synopsis:
Author Name: Morgan Battisti
Posted: 07-08-2014 02:39 PM
Views: 25766
Synopsis:
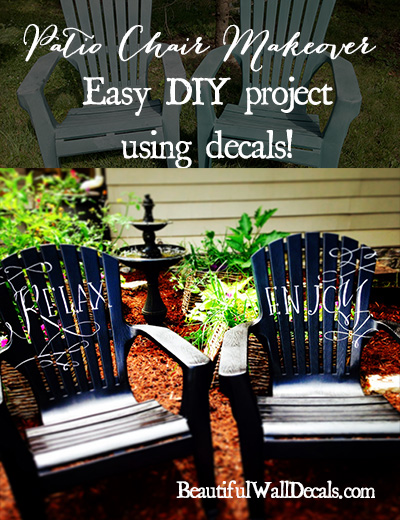
Easy plastic patio chair makeover using decals and spray paint. Get a new look for those tired old chairs!
|
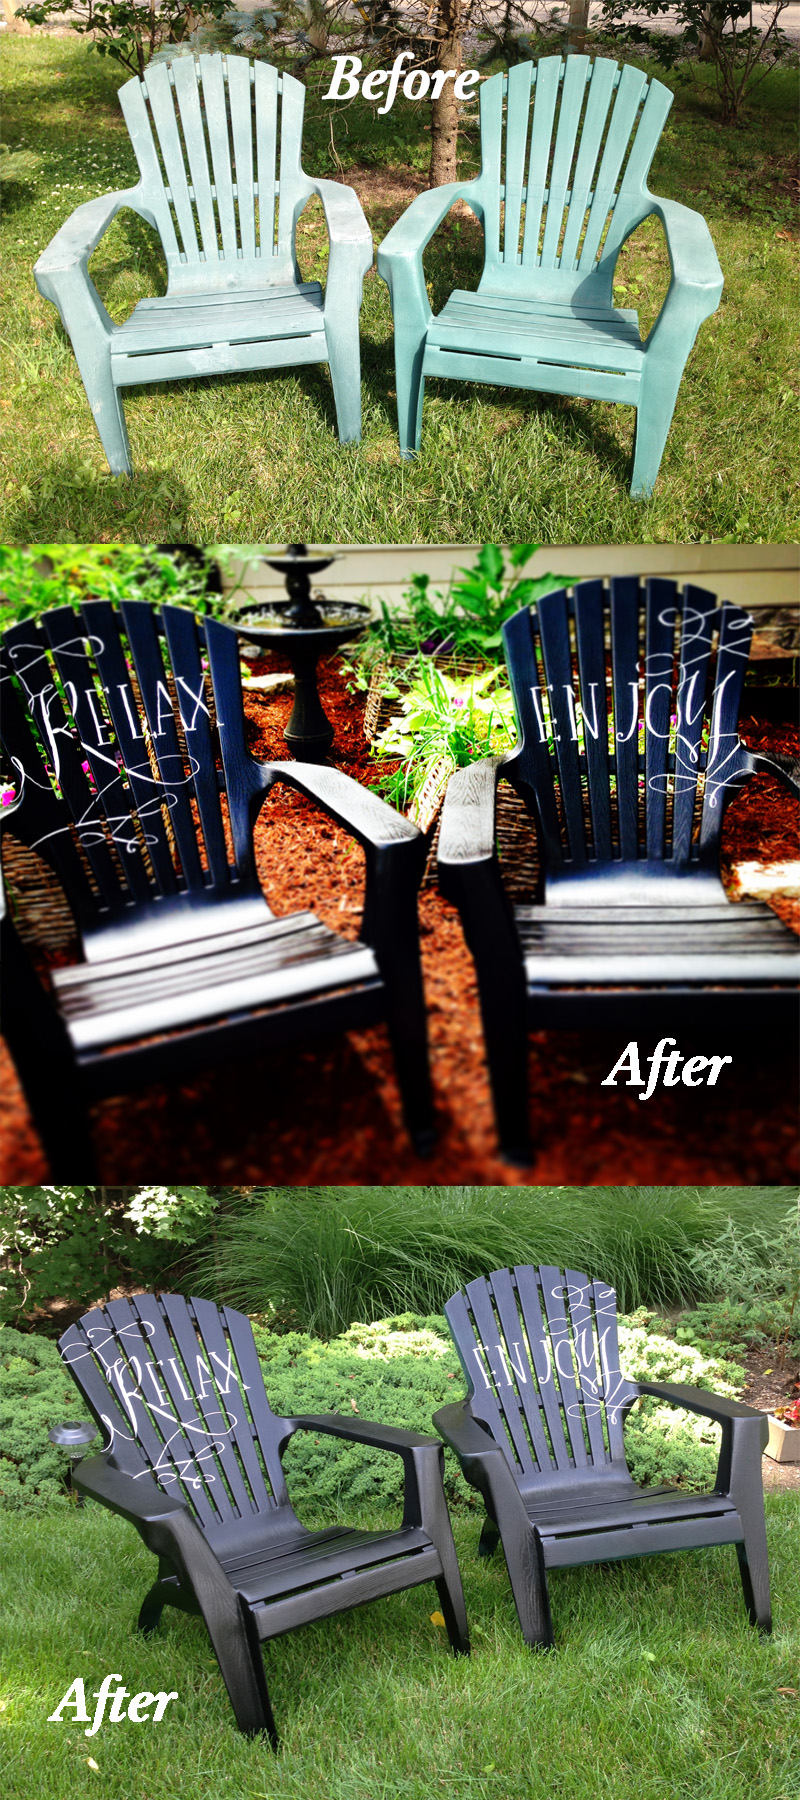
What do you get when you have a couple of old faded plastic deck chairs laying around and you happen to own a decal company? You get a chance to do an extreme Adirondack Chair makeover!
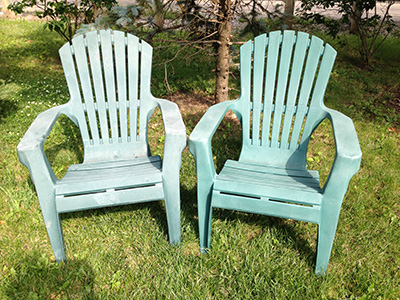
While I’m not usually a fan of plastic chairs, there is just something about the Adirondack chair that makes me want to sit down and sip an iced tea during the summer. This pair was showing their age and had started to fade. I wanted a branch with birds, but after seeing this design come through the studio, I knew I had to use the script on the chairs. The swoopy accents go ‘off the edge’ on purpose because I liked the fact that these were slightly off kilter—it adds to the fun. Now we have a pair of chairs that are the envy of the neighborhood! Easy DIY instructions 1. Find a pair of chairs that could use some love, like these here:
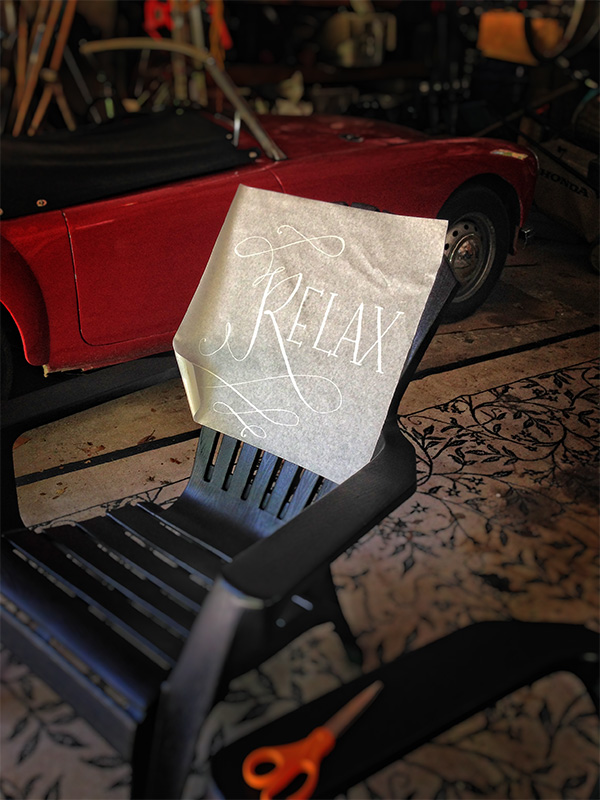
2. Order a decal for your project (use the Relax & Enjoy decal we used for this project, dots, branches, a fun monogram, or just about anything!) 3. Paint the chairs with your choice of spray paint (we used Rustoleum black matte, because we had it laying around) and let the chairs dry for at least 24 hours. 4. Remove the backing from the decal and carefully apply it to the chairs. The decal is easy to work with it to position because it really doesn’t want to stick to the chair well. I used scissors to cut the letters between the slats, then wrapped the letters back against the slats rather than cutting them off. I think it works better that way, but you can be the judge. I had to work with the spacing on “ENJOY” a bit since I had to make sure that the letters didn’t disappear into one of the slat openings. Remove the backing paper slowly and carefully.
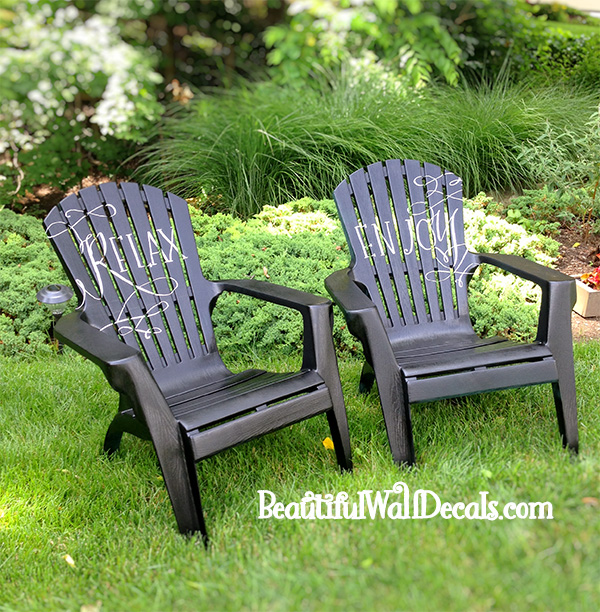
5. Once the decal is on the chair, brush or roll on at least 2 coats of water based polyurethane to seal the decal to the chair. Be sure to choose a finish that matches the paint you used for the chair or else you’ll have to cover the entire chair. I only used the poly on the back slats for this project, and you can’t tell the difference between the back and the rest of the chair. So far these chairs have endured a lot of sunshine and a number of downpours that Ohio is continually throwing our way. The lettering is holding up thanks to the polyurethane layers, and everyone that sees them thinks they were hand painted.
About the Author
|
-
 Best Selling Decals (66)
-
 Artistic Wall Decals (88)
-
 Words & Wall Quotes (74)
-
 Trending (33)
-
 Young at Heart (189)

Their online chat helped me connect with a person! I am someone who likes the human connection, so for me that made all the difference.
Every person I ""spoke to "" online at beautiful walls was helpful, courteous, friendly, and patient! No matter how many times I had a question or needed to make a change they quickly and kindly responded! I would (in fact I already have) recommend them to my friends and family!
Feb 3, 2016
-
Life is Not Measured Wall Decal
 $24.99
 -
Family Where Life Begins Wall Decal
 $19.99
 -
Home is Where Love Resides Wall Decal
 $44.99
 -
Chanel Wall Decal
 $19.99
 -
Ornate Baroque Wall Decal
 $39.99
 -
Bubble Dot Circles Wall Decal Pack
 $31.99
 -
Blossom Tree Large Wall Decal
 $79.99
 -
Basketball Lines Wall Decal
 $34.99
 -
Color Sample Card
 $3.00
$3.00 -
Custom Wall Decal
 $10.00